Subscriben’s transactions
Transactions allow you to view the events and their details that have occurred within Subscriben.
View transactions
Click the Transactions menu link from Subscriben’s WordPress admin menu to view your list of transactions:
![]()
Clicking on the subscription ID, product ID or order ID will take you to the subscription, product or order edit page respectively.
Actions
An action tells you the name of the functionality that Subscriben attempted to perform.
The full range of possible actions:
- New Order: A new subscription has been created
- Payment Received: The payment has been successfully received. This also occurs when the order status has been changed to ‘processing’ or ‘completed’
- Renewal Order: A renewal order has been generated for an upcoming payment
- Suspension: An automatic subscription suspension due to non-payment
- Automatic Cancellation: An automatic subscription cancellation due to non-payment
- Manual Cancellation: The subscription has been cancelled either by the shop admin or the customer
- Order Cancellation: The order and its corresponding subscription have been cancelled
- Order Refund: The order has been refunded
- Expiration: The subscription has expired because its Max Length setting has been reached
- Payment Due: The scheduled payment is due
- Payment Reminder: A payment reminder has been sent to the customer
- Subscription Deleted: The subscription has been deleted by the shop admin
- Pausing Subscription: The subscription has been paused either by the shop admin or the customer
- Resuming Subscription: The subscription has been resumed either by the shop admin or the customer
- Address Changed: The shipping address has been updated either by the shop admin or the customer
- Scheduled Date Change: Either the subscription’s renewal or the payment date has been changed
Results
The result lets you know the outcome of the performed action.
The full range of possible results:
- Success: The action successfully completed.
- Error: An error occurred whilst processing the action.
- Processing: The action is still being performed. Something may have gone wrong if the transaction stays in this state for longer than 30 seconds.
- Failed: An action that failed to complete but did not error. For example, insufficient funds for a recurring payment.
Customise transactions table
Subscriben allows you to customise your transaction list. You can show or hide table columns and change the number of items shown per page.
Showing or Hiding columns
Subscriben allows you to show or hide columns from your transactions list. For example, you can remove the ‘Product’ column. By default Subscriben shows all available columns.
To show or a hide a column:
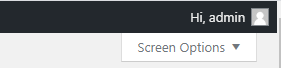
1) Click ‘Screen Options’
2) Uncheck the columns you wish to remove or check the columns you wish to show
![]()
3) Click ‘Apply’
Change items per page
To change the amount of transactions per page shown:
1) Click ‘Screen Options’
2) Increase or decrease ‘Number of items per page’
![]()
3) Click ‘Apply’
Filtering transactions
Subscriben allows you to filter your transactions in two ways: searching or preset filters.
Searching
Subscriben allows you to search your transaction list using the search box provided:
![]()
You can search your transaction list using two different types of search: free search or context search
Free search
A free search will try to find a match by searching all of the following fields: subscription ID, product ID, variation ID and order ID
Context Search
Sometimes you need more precision with your searches; so using a context search allows you to state a specific field to search.
To perform a context search prepend a context keyword to your search term followed by a colon:
![]()
The following context keywords are available:
- Subscription: Searches the subscription IDs
- Product: Searches the product IDs
- Variation: Searches the variation IDs
- Order: Searches the order IDs
Preset filters
Subscriben allows you to filter your transactions using preset filters:
![]()
Using Subscriben’s preset filters you can filter your transactions by date, by action and by result.
Click the filter’s drop-down menu and select the filter you wish to use then press the ‘Filter’ button:
![]()
Your transaction list will now be filtered based on your selection.